Pressure measurement, control and limiting

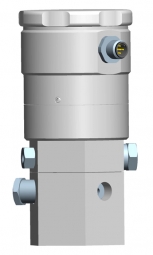
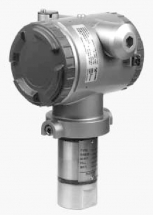
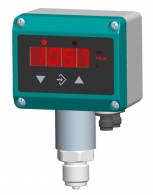
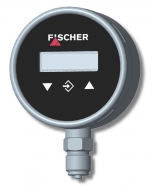
The German company FISCHER Mess- und Regeltechnik GmbH offers system solutions based on the measurement and control of physical quantities such as pressure, differential pressure, flow, level and temperature. Depending on the requirements, the systems are supplemented with other measurement technologies. In this way, the company provides a system architecture that meets the specific requirements for the realisation of trouble-free and cost-effective production processes. With FISCHER measurement and control technology, the user can optimise production processes and reduce production costs.
| Device | Fluid | Gas | Min. | Max. | ATEX | Output | Data | Man. |
|---|---|---|---|---|---|---|---|---|
| MA12 | X | X | 250 mbar | 25 bar | — | Indicator | ||
| MA13 | X | X | 0,6 bar | 600 bar | — | Indicator | — | |
| MA15 | X | X | 25 mbar | 40 bar | 1, 2, 21, 22 | Indicator | |
|
| MA32 | X | X | 0,6 bar | 600 bar | — | Indicator | — | |
| ME01 | X | X | 0,6 bar | 60 bar | 2, 22 | Analog | ||
| ME11 | X | X | 0,6 bar | 60 bar | — | Analog | ||
| ME12 | X | X | 0,6 bar | 60 bar | 2, 22 | Analog | ||
| ME13 | X | X | 0…10 mbar | 0…1000 bar | — | Analog | — | |
| ME49F | X | X | 40 mbar | 40 bar | 1, 2 | Analog | — | |
| ME49T | X | X | 40 mbar | 1,6 bar | 1, 2 | Analog | — | |
| ME50 | X | X | 10 mbar | 40 bar | 2, 22 | Analog + Switch | ||
| ME56T | X | — | 1 mws | 25 mws | — | Analog | — | |
| ME69 | X | X | 0,6 bar | 10 bar | — | Analog | ||
| ME71 | X | X | 130 mbar | 100 bar | — | Analog | — | |
| MS10 | X | X | 200 mbar | 15 bar | — | Switch | ||
| MS11 | X | X | 250 mbar | 25 bar | — | Switch | ||
| MS12 | X | X | 1,6 bar | 60 bar | — | Analog + Switch | ||
| MS13 | X | X | -1 bar | 60 bar | — | Analog + Switch | ||
| KE | — | — | — | — | — | Switch | — |
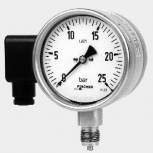
Pressure gauge MA12, especially suited for heavy measuring conditions, e.g. in case of pressure shocks, vibrations or high demands on breaking capacity. The overpressure safe measuring system guarantees high operation safety. The pressure chamber and the measuring diaphragm are available in different materials to meet various requirements. This pressure instrument is based on a rugged and uncomplicated diaphragm movement, suitable for overpressure and partial vacuum pressure measurements. In non-operative state, forces of the springs on both sides of the diaphragm are balanced. Pressure or vacuum to be measured creates an unbalanced force of the springs until a new balance is reached. When subjected to excessive pressure, the diaphragm rests on metal supporting plates. A centre-mounted tappet transfers motion of the diaphragm system to indicator movement and operating elements of micro switches. Manufactured part numbers open, use the search ctrl + F
|
The MA13 manometer for overpressure and underpressure fulfils high technical requirements regarding corrosion resistance and robustness. It is suitable for the measurement of fluid and gaseous media that are not highly viscous or crystallizing. The fluid or gas at the pressure to be measured is channeled into the meter through the connecting shank. This application of pressure causes the measuring element to deform elastically and thus to move. This movement, transformed by the motion train, deflects the needle proportionately to the pressure. Together with the motion train, needle and dial, the measuring element and the connecting shank comprise a physical unit. This makes the measuring system independent of forces acting on the housing. Internal arrester supports limit the needle deflection to 270°.
|
The MA15 serve to measure over-pressure and under-pressure in industrial applications. The optional installed switch elements are low-action contacts, mechanical magnetic spring contacts, inductive proximity switches in a slotted design or capacitive rotation angle encoder.(1) If the set limit values are exceeded, the output power circuits are opened or closed. The corresponding setup regulations are to be considered for each application case. The measuring element, the concentric corrugated diaphragm, is clamped between two flanges and the medium is applied on one side. The diaphragm manometer fulfils the requirements of the standard EN 837-3. Manufactured part numbers open, use the search ctrl + F
|
The MA32 transmitter pressure gauge converts pressure values into standardised electrical signals. These standardised signals are suitable for transmission to indicating, recording or controlling receivers. Large distances can be bridged between the measuring point and the receiving device without signal distortion. At the same time, the transmitter pressure gauge provides an analogue local display. Manufactured part numbers open, use the search ctrl + F
|
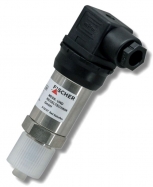
The ME01 is a pressure transmitter with a ceramic measuring cell and is suitable for measuring over-pressure and under-pressure for non-aggressive liquid and gaseous media. Depending on the model, the device can be used to measure relative pressure or absolute pressure. Typical applications are a procedural technology, environmental technology, mechanical and plant engineering. Main features: relative pressure or absolute pressure measurement, large vibration resistance, highly precise, highly overpressure-proof, LED measuring data display, analogue output for remote transmission. Manufactured part numbers open, use the search ctrl + F
|
The ME11 is a pressure transmitter with a ceramic measuring cell that is suitable for measuring over-pressure and under-pressure in non-aggressive liquid and gaseous media. The measuring pressure acts on a ceramic membrane that deforms when under pressure. There is a DMS bridge attached to the ceramic membrane. When the ceramic deforms, the output signal of the DMS bridge changes. The electronics integrated into the device convert the bridge signals into electrical unit signals 4...20 mA or 0…10 V DC um. Manufactured part numbers open, use the search ctrl + F
|
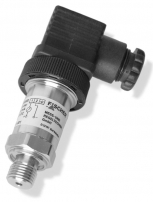
The ME12 is a pressure transmitter with a ceramic measuring cell for over-pressure and under-pressure and can be used for both relative and also absolute pressure measurements. The pressure transmitter can be used with non-aggressive liquid and gaseous media. The pressure sensor work on the thick layer technology DMS principle. The measured pressure acts directly onto a ceramic membrane that deforms when under pressure. This changes the resistance of the attached DMS bridge. Electronics integrated into the device convert this bridge signal into an electronic output signal. Every pressure transmitter is programmed according to the code in the order code on delivery. Also, the electrical connections can be used to configure the pressure transmitter, adapting it ideally to suit the process conditions. Manufactured part numbers open, use the search ctrl + F
|
The ME13 offers fast reaction time, robust stainless steel design, high degree of overload pressure safety, high acceleration and vibration strength, excellent long-term stability. The pressure transmitter is used to measure the relative pressure of gases and liquids. Manufactured part numbers open, use the search ctrl + F
|
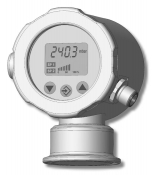
The ME50 is suitable for measuring relative pressure and under-pressure in fluid or gas-like, neutral, non-aggressive media. If there is dirty or aggressive media in the system, or if this is to be expected, the device must be modified in terms of those parts that come into contact with the media. Depending on the measuring range, the ME50 is produced with a ceramic or a piezo-resistive measuring cell. Two switch outputs are also possible in the version with a 3-conductor connection. The ME50 versions differ in the number and type of outputs available. The process connection uses a Tri-Clamp connection acc. to DIN 32676. A G½ inch process adapter with a TC flange can be delivered fro this connection. The device can be configured on site using the membrane keyboard. Manufactured part numbers open, use the search ctrl + F
|
The ME49F is a pressure transmitter for applications in explosive areas according to ATEX Directive 2014/34/EU, gas explosion protection zone 1. The measuring pressure acts on a ceramic membrane that deforms when under pressure. The output signal on the measurement bridge attached to rear of the membrane changes when the membrane deforms. Electronics integrated into the pressure transmitter housing converts the sensor signal into an electronic uniform signal 4...20mA. Manufactured part numbers open, use the search ctrl + F
|
The ME56T electropneumatic level transmitter uses the "bubbling-through principle". Via the throttle, compressed air is continuously bubbled into the sounding tube and into the liquid. Inside the sounding tube, a pressure equal to the pressure level in the liquid starts to builds up. A pressure sensor measures this pressure and the transmitter electronics converts this into a current signal between 4 ... 20 mA, which is proportional to the fluid level. In case the pressure inside the sounding tube exceeds the admissible over-pressure of the pressure sensor, the connection to the pressure sensor is interrupted by the safety valve, thus protecting it from overload and damage. A check valve prevents the backflow of fluid from the sounding valve into the air supply. The level transmitter shall be installed at above the tank or at its side. All connection lines must be fitted in such a way as to prevent mechanical forces acting upon the device.
|
Pressure transmitter ME69 with a ceramic measuring cell, housing and process connection in plastic. The pressure transmitters of this series are suitable for various measuring tasks in the following areas: electroplating, water treatment systems and drinking, service, process and waste water. The pressure transmitter ME69 is used to measure over-pressure in acidic or alkali media that are compatible with the materials listed under the technical data. The measuring pressure acts on a ceramic membrane that deforms when under pressure. This alters the output signal of the DMS bridge on the rear of the ceramic membrane. The electronics integrated into the device convert the bridge signals into electrical unit signals 4...20 mA or 0…10 V DC.
|
The ME71 pressure transmitter uses a capacitance type sensor and modern microprocessor technology. It is ideally suited for measuring positive and negative gage pressure in applications where a high degree of accuracy is required. It is optionally available in versions certified for use in hazardous locations.
|
Overpressure and vacuum proof contact pressure gauge MS10 for control and supervising purposes in vacuum processes. Application Fields: winning of drinking water, water economy, process technology, terotechnology pneumatic transporter. The measuring system consists of two encapsulated and hydraulically coupled metal diaphragm. When subjected to pressure it causes a deflection proportional to the strength of pressure. Opposite of the medium-touched diaphragm a tappet returns the deflection to a motion work and the operating elements of the micro switches. When subjected to excessive pressure each metal diaphragm based oneself on the chassis of the capsule. Therefore the device is prevented from damage.
|
The MS11 contact manometer is a combined measuring and switch device for pressure measurements under difficult conditions, such as pressure impacts, vibrations, frequent switch processes or high requirements on the switch performance. The device is suitable for gaseous media and fluid media. The device can be used as a functional safety components (SIL).
|
Compact parameter driven pressure switch and transmitter MS12 for positive and negative pressure control. Typical Applications are pressure switch and pressure display for unconvenient, accessible measuring places, level measurement, simplified pump control, monitoring of pumps and compressors. The MS12 processes the output signal of the integrated pressure sensor digitally.
|
Digital Pressure Transmitter and Switch with Colour Change Display MS13 is a pressure transmitter and switch for measuring relative pressure. Theunit is suitable for measuring pressure and under-pressure in non-agressivegas-like and fluid media. The MS13 complies with the state-of-the-art and is safe; it also takes into ac-count the relevant regulations and EC directives.
|
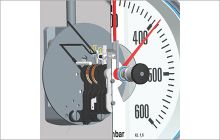
Limit Switch KE - additional electrical attachments for installation in Fischer analogue measurement devices. The limit switch is installed below the dial. It is designed so that the actual value display can move freely across the entire scale. There is an adjustment lock attached to the front pane. Using a detachable adjustment key, the con-tacts mounted to the target value displays can be set to every point of the scale range. If the contact arm that is connected to the actual value display reaches the contact pin on the target display, the power circuit is closed. An elastic connection between the contact arm and the actual value display keeps the contact closed until the actual value deviates from the set target value. Manufactured part numbers open, use the search ctrl + F
|


